Implement visual-level security in Power BI with row level security
13 Aug 2024
Imagine you have a report used by two different groups, managers and staff members. The content on each page is identical, except for one chart that’s relevant only to managers and needs to be hidden from staff members. Instead of creating two separate versions or splitting the report, you can use this simple hack to hide the chart from staff.
Visual-level security
Visual-level security refers to the ability to control access to specific visuals (like charts or tables) within a report, ensuring that only certain users or groups can see them.
For a practical demonstration, let’s use this video to illustrate how visual-level security can be implemented effectively.
The video shows how the report should look to staff members vs. managers (who have access to additional tables).
A tutorial on our scenario
Scenario:
You have a Matrix visual showing gross sales for each product and country.
You also have a bar chart for each product’s gross sales.
The Employee table contains employee details such as name, email, and a column validating if the employee is a manager.
Managers have an extra column of product names.
Requirement:
If a manager logs in, they should see a bar chart and 2 Matrix visuals of the gross sales of all products and countries.
If an employee logs in, they should only see a bar chart and Matrix visual of the gross sales of all countries (Product data is not displayed for employees)
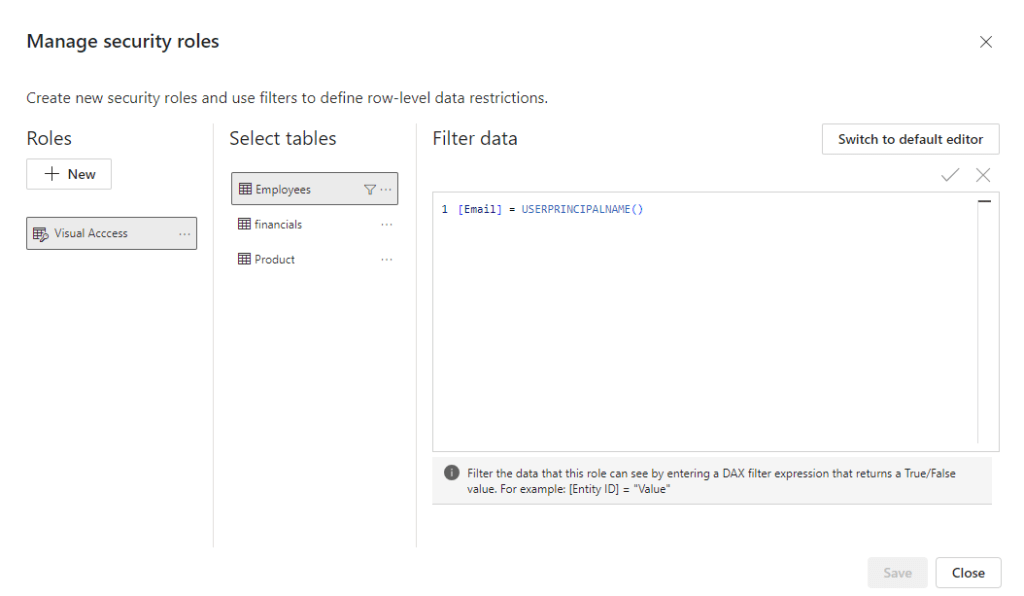
Step 1 : Set Up Dynamic Row-Level Security (RLS)
Create a Dynamic Visual Access role by filtering the access table’s email ID with USERPRINCIPALNAME() as you would with any Dynamic RLS setup.

Step 2: Data Modelling
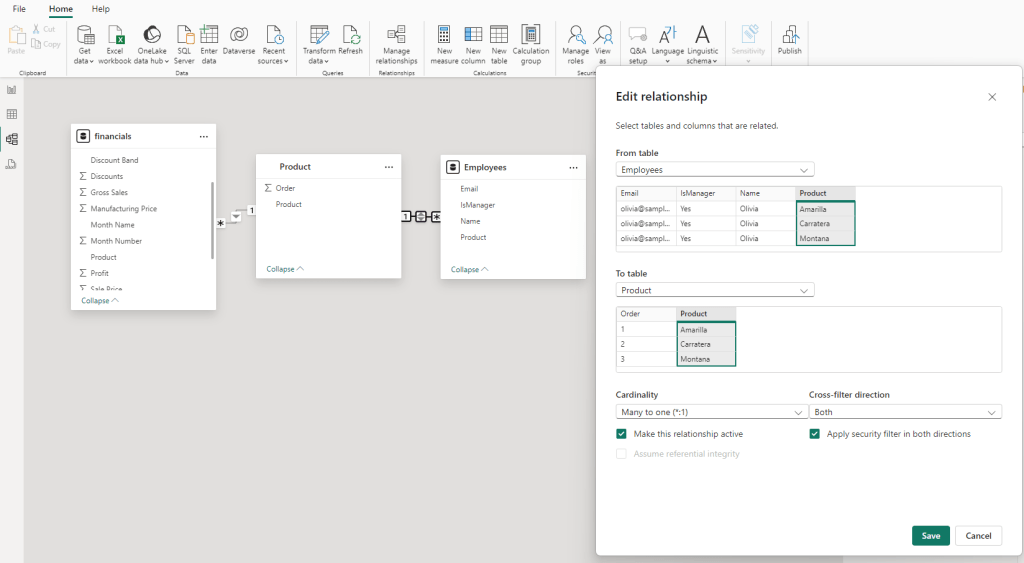
Connect the Product column from the access table with the Product table (a unique list of products).
Change the filter direction and apply a security filter to flow in both directions.
Step 3: Testing Initial Setup
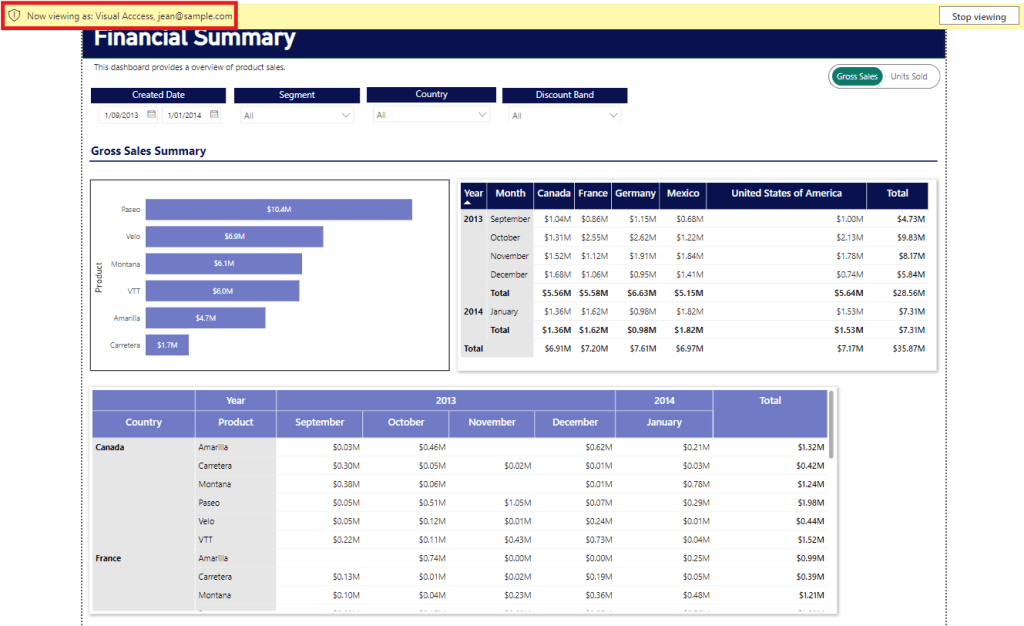
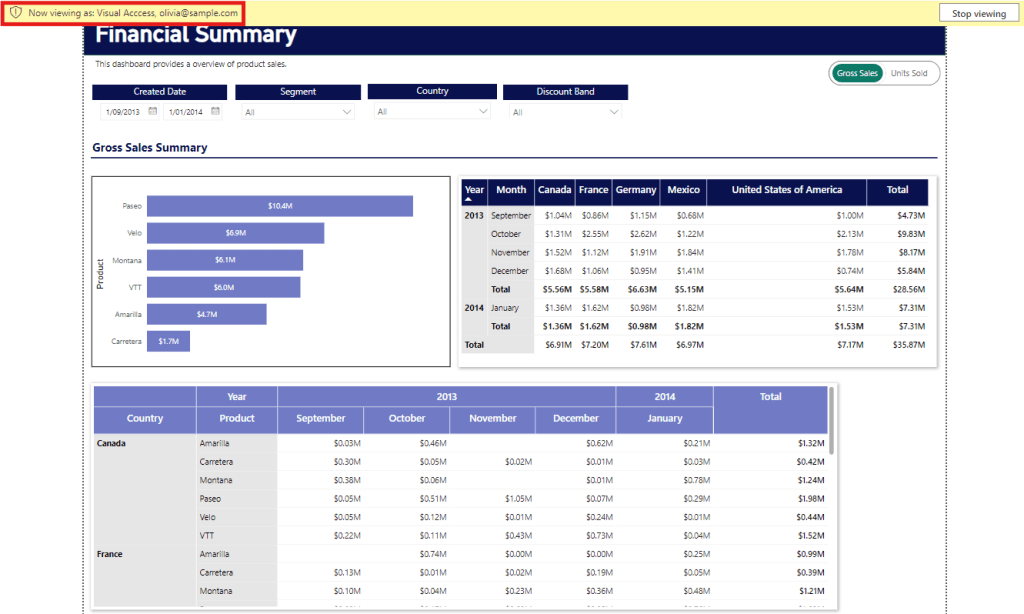
Test the access to see how it looks. In this example, we have Olivia as a manager, while Sam and Jean are regular employees (non-managers). To do this, go to ‘Modeling’, click on ‘View as’, click on ‘Other user’.


Fill in the employee’s email, then click on ‘Visual Access’

You’ll notice that both visuals appear for all users
Staff member view
Manager view
Step 4: Create DAX Measure for relevant visuals
Create a new DAX measure for the Matrix that:
Displays the gross sales amount for each product according to country
Validates the role, so it only shows data if a manager is logged in.
If a non-manager is logged in, the measure should return no value.
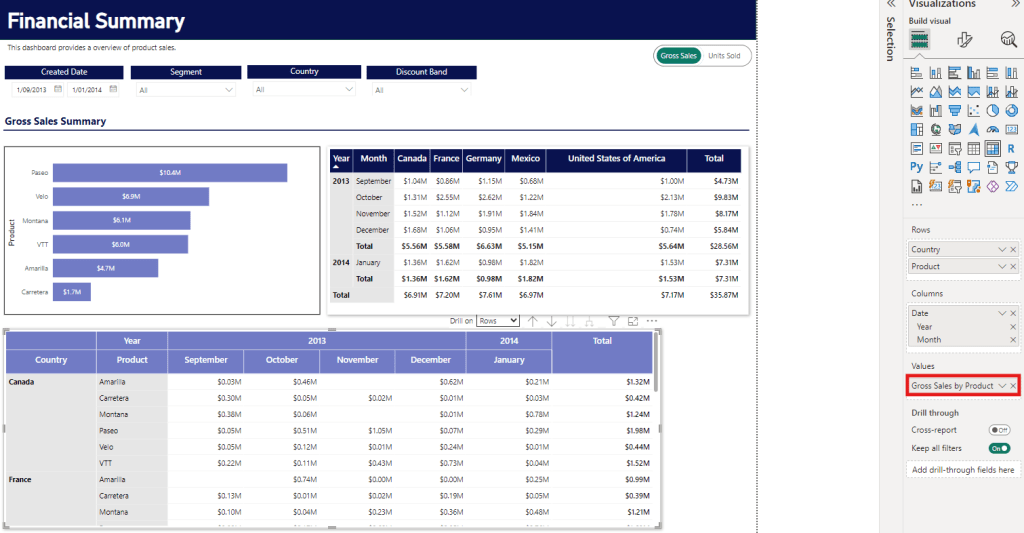
Swap the value of the Matrix to this measure

Similarly, we can insert a shape that covers up the Matrix and create another DAX measure to hide the empty Matrix when a regular employee accesses the report, this measure should:
Change the colour of the shape to transparent when the user is a manager and white when the user is a non-manager
To do this, click on the fx icon for Conditional Formatting and change the Format style to ‘Field value’ and direct the field to the new measure
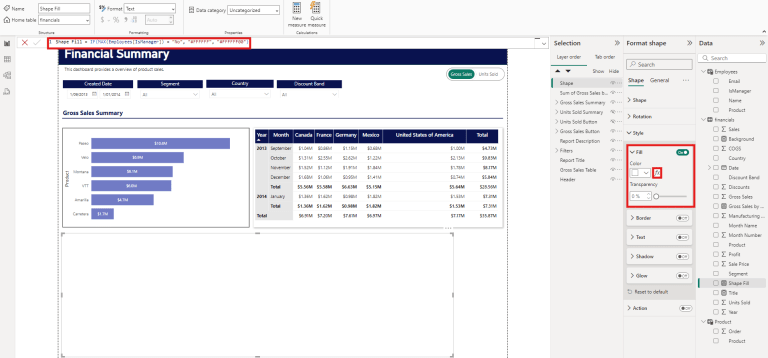
Test the access to see how it looks:
Staff member view
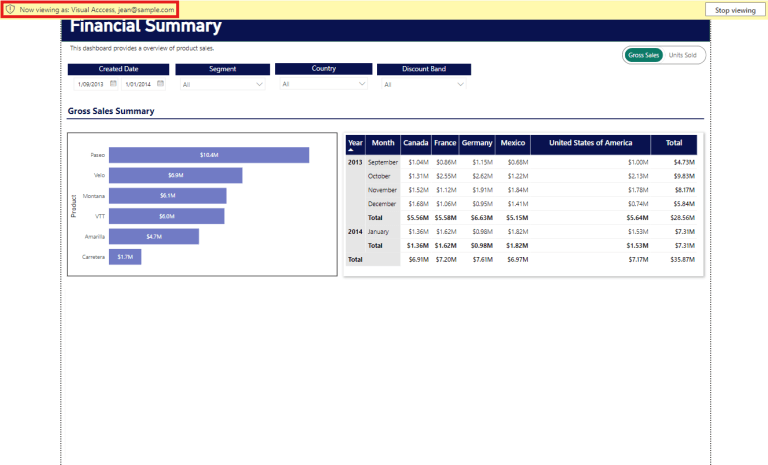
Manager view
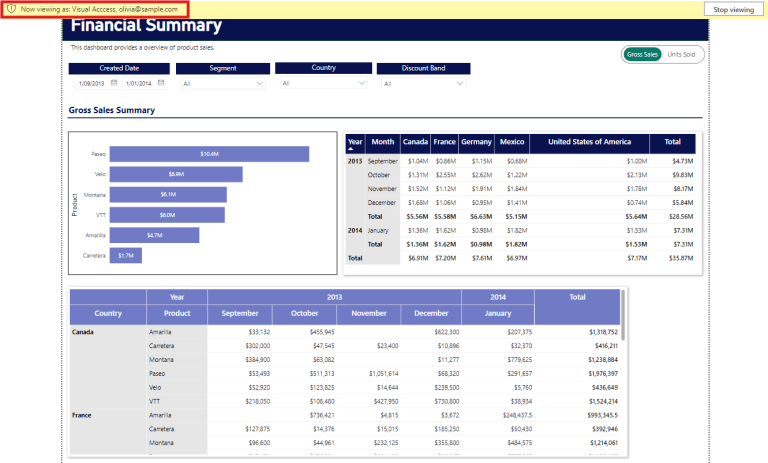
Step 5: Additional visual-level rules (optional)
To hide the Product gross sales bar chart, create another DAX measure that changes the colour of the background to transparent when a non-manager accesses the report and white when the user is a manager.
Set the colour of the background using conditional formatting, change the Format style to ‘Field value’ and direct the field to the new measure


Lastly, create a DAX measure to hide the title of the y-axis in the bar chart. It should change the colour of the font to transparent when a non-manager accesses the report and to black when the user is a manager
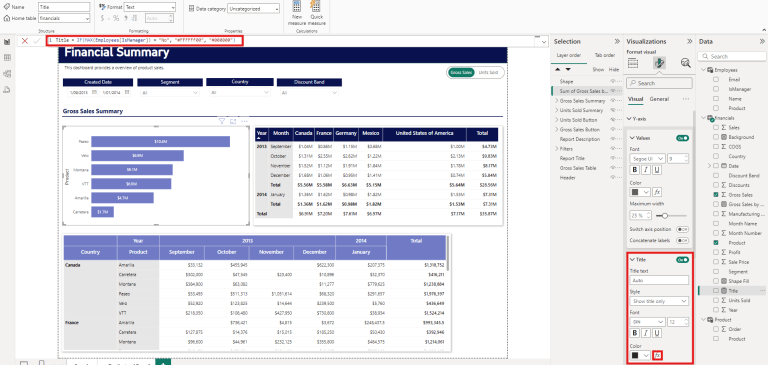
Step 6: Final Testing
Test the solution by logging in as an employee (e.g., Jean), then as a manager (e.g., Olivia) to see if correct visuals appear for each role.
And there we have it!
This approach is great because users can still access the report in the way they prefer without any compromises. By leveraging visual-level security combined with dynamic row-level security in Power BI, you can avoid duplicating reports, making it easier to manage and update a single, unified report as logic changes or enhancements are needed.
This method ensures that sensitive data remains protected and provides a centralised source for information, minimising redundancy. As your organisation evolves, this scalable solution will continue to meet the growing demands of your data strategy, delivering tailored insights to different user groups within a streamlined and efficient reporting structure.
Interested in seeing this in action? Download our Power BI sample report
Discover how to apply visual level security in Power BI using dynamic RLS and DAX techniques with our tutorial example above.
Enter your details below to receive the Power BI report by email.
View our Privacy Collection Notice here to learn how we manage your personal information collected through this enquiry form.
Frequently Asked Questions (FAQs)
Can I apply visual-level security to multiple visuals within the same Power BI report?
Yes, visual-level security can be applied to multiple visuals in a report. By creating specific DAX measures and using conditional formatting, you can control which visuals are visible to different user groups. This allows you to customise the report experience for each group without duplicating content.
How do I test if visual-level security is working correctly in Power BI for different user roles?
You can test visual-level security by using the ‘View as’ feature in Power BI. This allows you to simulate how the report will appear to different users based on their roles. Simply input the email address of the user you want to test and select the appropriate security role to see how the report behaves for them.
Is it possible to hide entire pages of a Power BI report from certain users?
While visual-level security focuses on hiding specific visuals, you can use page-level security combined with Dynamic Row-Level Security (RLS) to restrict access to entire pages of a report. By applying filters and roles, you can ensure that only authorised users can see certain pages, enhancing the security and customisation of your reports.
This post was written by Shirlyn, with support from Natasha and E.R.I.C.A.
About the author
Shirlyn is a Consultant with a background in Mathematics and Applied Statistics. She excels in data wrangling, exploratory data analysis, and creating interactive data visualisations, making her a proactive problem solver who delivers user-friendly solutions. As our resident data visualisation expert, she holds a Power BI certification and has experience across various industries, including logistics, recycling, and financial institutions. In her spare time, Shirlyn enjoys watching The Big Bang Theory and The Office on repeat.
Subscribe to our newsletter to receive the our latest data analysis and reports directly to your inbox.

