EdgePreso: Revolutionising data insights for a major supermarket
19 Jan 2024

In the dynamic realm of data analytics, EdgeRed proudly introduces EdgePreso, a groundbreaking solution engineered to tackle the prevalent challenges faced by data analysts: the time-consuming and repetitive process of manual report generation.
1. Context and Background
Picture this scenario: analysts supporting diverse business units, tasked with producing a myriad of reports to distill insights from complex data sets. This not only proves to be a repetitive and mundane activity but also becomes a substantial roadblock to dedicating quality time to interpreting data and making insightful decisions.
This is the problem our client is currently facing. Preparing a single report takes days, breeding frustration and inefficiency. Adding to that, high risk of manual human error.
2. The EdgePreso Advantage

User-friendly Interface
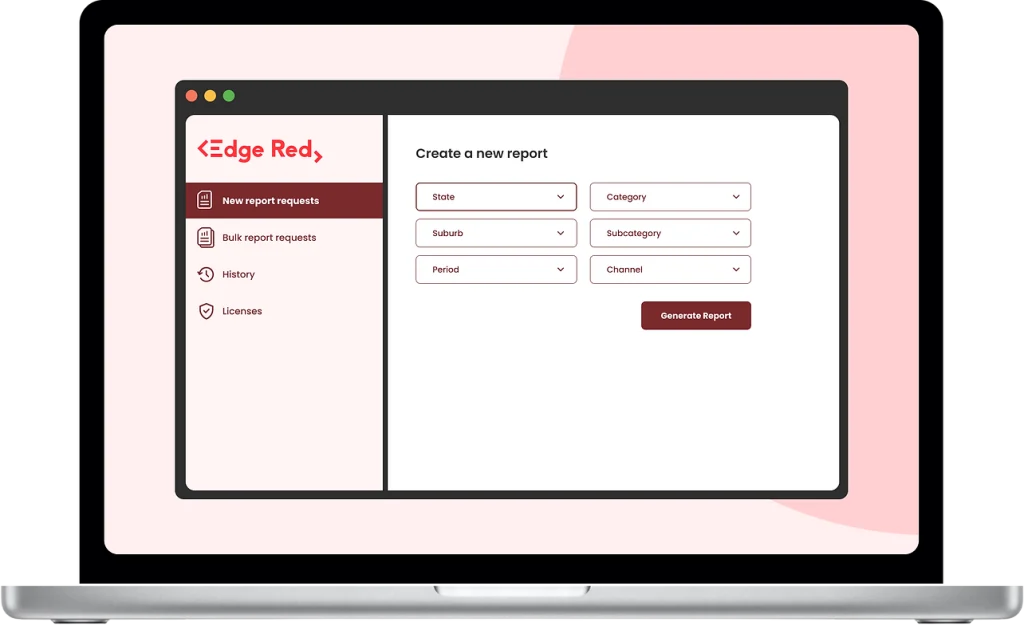
Enter EdgePreso – a user-friendly interface where analysts effortlessly input parameters, triggering the magic that automates Google Slide or PowerPoint creation with dynamic charts and tables. Access our collection of pre-built or custom slide templates to craft visually stunning presentations and elevate your content.
Rebalancing an Analyst’s Role
EdgePreso isn’t just an automation tool; it’s a game-changer in reshaping the analyst’s role. By streamlining the tedious tasks, it liberates analysts to concentrate on what truly matters – interpreting trends and offering actionable insights. Say goodbye to the days of laborious manual data extraction and presentation crafting.
Direct Data Integration
To keep insights fresh, EdgePreso seamlessly connects to the data source such as Google BigQuery, Amazon Redshift, Snowflake or Excel. This integration ensures that analysts utilises the latest data without the fuss of constant manual updates.
3. Approach
Beginning with an understanding of our client’s data architecture and business processes, we tailored a version of our EdgePreso tool to seamlessly integrate with their existing ecosystem. This customised solution was not just about managing large datasets but also about transforming them into actionable insights, with over 800 packs and more than 200 slides, created to cater to a variety of data cuts and business queries.
Our team was deeply involved in an iterative process of development, working in close collaboration with our client stakeholders. This ensured that the slide packs we produced were not only informative but also intuitive, allowing for easy digestion and decision-making. This evolution was marked by a commitment to enhance user experience and the introduction of ‘smart’ automated insights with the use of Gen AI and advanced LLM techniques.
4. Business Outcome & Client Testimonial
The impact of EdgePreso resonates through the corridors of our supermarket client, where four distinct business units seamlessly embraced the tool into their workflows. This retail giant astoundingly ran 500 reports, translating into a staggering 72,000 slides, over the past 12 months.
A Senior Strategy Manager shared insights, noting:
“EdgePreso frees up time for us to dive into the analysis. It slashes weeks of effort previously spent on pulling and presenting information, ensuring a concise, consistent, and visually appealing outcome. The automation not only saves time but significantly enhances quality and accuracy.”
EdgePreso: Elevating Data Reporting
More than just a product, EdgePreso is a transformative force in the realm of data reporting. By automating the tedious aspects of report generation, it empowers analysts to focus on the core – interpreting insights and steering businesses toward success.
With EdgePreso, EdgeRed maintains its commitment to revolutionizing data analytics, setting new benchmarks for efficiency and precision. Find out more about EdgePreso.

Frequently Asked Questions (FAQs)
EdgePreso prioritises data security and privacy throughout the integration process with various data sources. Our solution adheres to industry-standard security protocols to ensure that data transmission and storage are encrypted and protected. We work closely with our clients to implement access controls, data masking, and auditing mechanisms to safeguard sensitive information. Our team remains committed to upholding stringent data governance practices to maintain the confidentiality and integrity of our clients’ data.
Absolutely! EdgePreso offers flexibility in report customisation by allowing analysts to create custom report templates tailored to specific business requirements. Our solution provides a user-friendly interface where analysts can define parameters, select data sets, and design dynamic charts and tables. Whether it’s incorporating unique branding elements or showcasing specialised data cuts, EdgePreso empowers analysts to craft visually stunning presentations that align with their business objectives. Our team collaborates closely with clients to ensure that EdgePreso meets their unique reporting needs effectively.
EdgePreso is designed for continuous improvement and optimisation of automated reporting processes. We leverage user feedback, analytics, and emerging technologies to enhance EdgePreso’s capabilities and user experience over time. Our iterative development approach allows us to introduce new features, integrate advanced AI techniques, and refine existing functionalities based on evolving business requirements. By staying responsive to client needs and industry trends, EdgePreso remains a cutting-edge solution that elevates data reporting efficiency, precision, and impact.
About EdgeRed
EdgeRed is an Australian boutique consultancy specialising in data and analytics. We draw value and insights through data science and artificial intelligence to help companies make faster and smarter decisions.
Subscribe to our newsletter to receive our latest data analysis and reports directly to your inbox.
